Showing posts with label cookies. Show all posts

Thursday, February 3, 2011

Cookies, a Confession, and a Mystery

It's been a couple weeks since my last blog. My apologies. I had to trek up to Columbia for a few days since classes are resuming. I would like to take a moment to state that in 6 months I will be finished with school...!!!!!!!! Thank goodness! I'm ready for a break. A break that will be full of reading, resting, baking, recovering, quilting, and other interests.

I just felt very lost thinking about all that free time.

I like the idea of not juggling a full-time career and full-time school, but I don't like the idea of wandering aimlessly. Eh. It'll all work out. If nothing else, I'll spend my time off mailing cards, becoming proficient in Spanish, making quilts, reading tons of books, helping out at The Kitchen Clinic, working out, baking, and hanging out with God.

I do have an actual recipe to share today. Not just ramblings. But first I need to confess. Meat grosses me out when I cook it. If you've read back on my blog a bit, this is not a new fact which keeps it from being a confession. However, my confession is that this week I was taken down by a whole chicken. I was going to make chicken and dumplings, chicken noodle soup, chicken stock. Instead, the chicken beat me. I tried to take it apart after boiling it and I nearly lost it. Not lost it as in almost dropped it, but I was seriously sicked out at the chicken. I couldn't do it. I, a nurse that is not grossed out at the hospital, was undone by a whole chicken. It's true. And I'm not planning on attempting a whole chicken anytime soon. It's sick. Judge me if you must.

I need a husband that isn't grossed out by such things. Honey? Can you please come disassemble the disgusting former bird that's taunting me in the kitchen? Hmmm. This has potential.

Moving on. I currently look like...I don't know what I look like. We're having a murder mystery dinner in a week. It has a 1920's theme and so to pass our time during the weather we've been getting ready. Including trialing the makeup. The women of the 20's wore A LOT of makeup. A LOT. And so I'm wearing more eye makeup than I've ever worn in my life. And I have a flapper dress on order. And I'll be wearing a mink stole. And I just had the realization that sometimes the mink heads are attached. I hope that's not the case with mine. I'll likely pass out.

Alright, let's get down to baking business.

I found this cookie recipe on Orangette. Since I had whole wheat flour on hand, I decided to give it a whirl. They were okay, but I still like my cookies better. And away we go!

3 cups whole wheat flour (see note above)
1 1/2 tsp. baking powder
1 tsp. baking soda
1 1/2 tsp. kosher salt
2 sticks (8 oz.) unsalted butter, cut into 1/2-inch cubes (cold butter!!)
1 cup lightly packed dark brown sugar
1 cup sugar
2 large eggs
1 tsp. vanilla extract
8 oz. bittersweet chocolate (I used milk chocolate because it's my favorite.)

Position racks in the upper and lower thirds of the oven, and preheat to 350°F. Line two baking sheets with parchment. (If you have no parchment, you can butter the sheets.)

Combine the flour, baking powder, baking soda, and salt in a medium bowl, and whisk to blend.

Put the butter and sugars in the bowl of a stand mixer fitted with the paddle attachment. With the mixer on low speed, mix just until the butter and sugars are blended, about 2 minutes. Scrape down the sides of the bowl with a spatula. Add the eggs one at a time, beating well after each addition. Beat in the vanilla. Add the flour mixture to the bowl, and blend on low speed until the flour is just incorporated. Scrape down the sides and bottom of the bowl. Add the chocolate, and mix on low speed until evenly combined. (If you have no stand mixer, you can do all of this with handheld electric beaters and/or a large, sturdy spoon.) Scrape down the sides and bottom of the bowl, and then use your hands to turn and gently massage the dough, making sure all the flour is absorbed.

Scoop mounds of dough about 3 tablespoons in size onto the baking sheets, leaving about 3 inches between each cookie.

Bake the cookies for 16 to 20 minutes, rotating the sheets halfway through, until the cookies are evenly browned. Transfer the cookies, still on parchment, to a rack to cool. Repeat with remaining dough.


Natural light is my best friend when I'm cooking and photographing. The end.

Saturday, December 25, 2010

It's beginning to look a lot like Christmas...


A dusting of snow, cookies, Christmas movies, and family...it's officially Christmas! My brain is having a hard time grasping that Christmas is here (and nearly over). I think that's the downside of the last few years of a chaotic schedule; I have little concept of time as it relates to my personal life. My idea of days, weeks, months, etc revolve around due dates and my work schedule.

I watched Elf and Christmas Vacation today. That helped. And I received possibly my best present from my parents to date: a sewing machine! I'm quite excited about all the possibilities that the sewing machine brings. Cooking, sewing, and full of wit...is there nothing I can't do??!! (I kid, I kid.) And now I will present evidence of what I cannot do well: decorate sugar cookies.

The Pioneer Woman recently had a weekend where winners visited her Lodge (I entered, I lost, I wept). Bridget from Bake at 350 taught a class on cookie decorating. She's amazing. I want to be her. I tried to be her today. I failed. Okay, I did not fail, but boy howdy do I have room to grow.


Nielsen-Massey is the way to go. Trust me. Vanilla bean paste is a thicker consistency than vanilla extract, but it's still runny.


The bean paste leaves beautiful specks of the vanilla in the dough.


Disposable bags are easy when you use a coupler (the white part) with a tip (this is #2). I had no clue what a coupler was until a couple days ago. Bridget is changing my life. I used the bag and tip to pipe the outline of my tree... which you can't see, but let's pretend like I didn't mess it up. I ended up spooning the icing on instead of using the squeeze bottle for the flood icing since mine was too thick.


Here are her recipes:

Sugar Cookies
3 cups unbleached, all-purpose flour
2 tsp baking powder
1 cup sugar
2 sticks salted butter, cold
1 egg
2 tsp vanilla bean paste (this is one of her alternate versions)

Preheat oven to 350. Line cookie sheets with parchment paper.

Combine the flour and baking powder, set aside. Cream the sugar and butter. Add the egg and paste, mix well. Gradually add the flour and beat until just combined, scraping down the sides.

The dough will be crumbly so knead it together with your hands as you scoop it out of the bowl for rolling.

Roll out on a floured surface and cut into shapes. Place on parchment lined baking sheets (she recommends freezing the cut out shape on the baking sheet for 5-10 minutes) and bake for 10-12 minutes. Let sit a few minutes on the sheet, then transfer to a cooking rack.

Royal Icing
4 TBSP meringue powder (Williams-Sonoma, Ateco or AmeriColor, for best results)
scant 1/2 c. water
1 lb. powdered sugar
1/2 - 1 tsp light corn syrup
few drops clear extract (optional)

Combine the meringue powder and water. With the paddle attachment of an electric mixer, beat until combined and foamy.

Sift in the powdered sugar and beat on low to combine. (Do NOT skip the sifting!) Add in the corn syrup and extract if desired. ( I think the corn syrup helps keep the icing shiny.)

Increase speed to med-high/high and beat for about 5 minutes, just until the icing is glossy and stiff peaks form. (You should be able to remove the beater from the mixer and hold up and jiggle without the peak falling.) Do not overbeat.

Cover with plastic wrap touching the icing or divide and color using gel paste food colorings.

This "stiff" icing is perfect for outlining and even for building gingerbread houses and monogramming. To fill in your cookies, add water to your icing a teaspoon at a time, stirring with a rubber spatula, until it is the consistency of syrup. This technique of filling a cookie with thinned icing is called "flooding."

To fill the cookie, you'll need flood icing. To do that, you’d follow the steps above, adding small amounts of water (1 tsp at a time) until a ribbon of the icing disappears back into the bowl within a count of one thousand one, one thousand two.

Morals of the story:
1. Being tired and trying a new cooking challenge don't really go together.
2. I need way more practice.
3. This may not be my strong suit.
4. Merry Christmas!

Thursday, December 23, 2010

Instead of Raspberry Cordial...


Gillian and I had our second Anne of Green Gables viewing this week. Though this time, we barely watched the movie. Instead we talked about life, food, boys, how awesome we are (kidding...maybe), and about our dramatic teenage selves. If you've seen Anne of Green Gables, you'll know that in the first one, Anne and Diana have a "fancy" meal with Raspberry Cordial. Well, the cordial ends up boozing up Diana since it wasn't cordial after all. Oh, Anne. You and your shenanigans.

People are so hard on us redheads. Woe is me....

Sorry. I was feeling residual drama from my Anne viewing.

Anyway, instead of serving raspberry cordial or boozing it up with Gillian, we had our necessary chai tea lattes from Starbucks. And I presented a delicious array of treats. My trip to KC resulted in a ridiculous banana cookie from Upper Crust Bakery (center), lemon poppyseed and orange cranberry scones from Whole Foods (Whole Foods? I miss you. A LOT. Springfield? Get with it or I'm outta here!), little cinnamon rolls from Whole Foods (mine are better...sorry, but they are), Petite Palmiers from World Market (deep breaths...I love Springfield, I love Springfield, I love Springfield), and Tim Tam cookies from Pepperidge Farm.


Ginger is the new blonde! I'm dying right now. I have actual, factual tears in my eyes. My search for an Anne clip immediately provided me with this gem.

On an unrelated note, I think I might be losing my mind.

Wednesday, October 13, 2010

Homemade Oreos

This is the final bake-off recipe. I don't know how I feel about that. It's always nice to accomplish a project. Yet, it has been fun to see what other people are making. I wish, wish, wish I could have had some mega-baking weekend with guests galore. I enjoy cooking, but I love it more when others are involved. It's the sharing that makes it the most fun.

The final recipe is for Homemade Oreos, submitted by alwaysanadventure.

Alwaysanadventure loves to bake (which makes me like her instantly) and she has fantastic taste in music. If we ever spent time together in person, I'm pretty sure we'd be friends...though I'd likely spend the first couple hours mute because she's just that fantastic. I'd say that I want to be her when I grow up, but we're the same age...I don't know what that means for me. Maybe it means that since we have some commonalities that I'm cooler than I perceive? Yeah, yeah, I like where that's going. I bet if she met me in person she'd be mute too. I have that effect on people. [Insert swagger and head bob here.] Actually, I don't. I'm too silly to be intimidating. Okay, enough talk. We came here to bake! Well, you came here to read, but who cares about the details?

Here's her recipe for Homemade Oreos (originally from Smitten Kitchen):

Cookies:
1 1/4 c. flour
1/2 c. Dutch cocoa
1 tsp. soda
1/4 tsp. powder
1/4 tsp. salt
1 c. sugar (can be decreased to 1/2 c., which I would recommend)
1/2 c. + 2 Tb. unsalted butter, room temp.
1 egg

Filling:
1/4 c. unsalted butter, room temp.
1/4 c. shortening
2 c. powdered sugar
2 tsp. vanilla

1. Stir together flour, cocoa, soda, powder, salt, and sugar.
2. Add butter and mix thoroughly, then add egg and mix until dough comes together.
3. Spoon small teaspoons of dough onto parchment-lined or lightly greased cookie sheet and flatten slightly with the heel of your hand or the bottom of a cup.
4. Bake at 375* for 7-9 minutes. Watch them because cookies this small can burn quickly.
5. For filling, blend butter and shortening, then add powdered sugar and mix until crumbly. Add vanilla and mix until smooth.
6. Transfer my filling to a large ziploc bag and cut the corner off as a makeshift piping bag. Pipe about a tablespoon of filling into the middle of a cookie and top with another cookie. Press together gently until filling reaches the edges.
7. Store between layers of parchment or wax paper in an airtight container.


alwaysandadventures' results:
For the record, I think my cookies are too thin. Actually, I know they're too thin. Whoops. I was overzealous with my flattening. It didn't alter the taste, but it made it slightly tricky when pressing the cookies together for the filling. Don't be like me. A slight flattening will do. I love how these cookies actually look like Oreos minus the imprinting. The filling actually tastes like Oreo filling! I've never made a homemade version of a brand item before and this was a really fun start.

Keep your eyes peeled in the upcoming days because I'll be announcing the bake-off winner. I need to come up with a prize. I'll scrounge around my house and see what discarded item I can find. Kidding! Maybe. Sorta. No, I'm kidding. Kidding-ish. Stop it.

So what's ahead for my blog? Well, thank you for asking. That was very polite. I suppose I'll be starting on a list of items I'm wanting to try. Monster cookies, a new sugar cookie recipe, crockpot turkey, soft pretzels, pumpkin roll. It's fall now (!!!!), so I'm wanting to venture into some warm foods like soups, chicken pot pie, perhaps a quiche. Basically, it'll be a free for all depending on what strikes me. I really do wish I could invite you all over when I cook. One day, friends, one day.

Monday, September 27, 2010

Bear Paws


My first official use of my new mixer was the Bear Paws recipe. It comes from foodandwhine on Tasty Kitchen. (And yes, I meant to type whine not wine. It's her username.)

1/2 cup butter, softened
2/3 cup brown sugar
1/2 cup unsweetened applesauce
1 teaspoon baking soda
2 teaspoons hot water
1 whole egg
1 teaspoon vanilla
1 cup all-purpose flour
3 cups rolled oats
1 tablespoon flaxseed meal
1/2 cup chocolate chips

These are basically a healthier oatmeal chocolate chip cookie. And they're delicious. I also used more chocolate chips than the recipe called for...surprising after my last post about chocolate chips, right?

Cream butter and sugar together, then mix in applesauce. Dissolve baking soda in hot water and stir into butter mixture. Add egg and vanilla and beat well. Combine flour, oats and flax and add to mixture. Stir in chocolate chips. Drop tablespoonfuls onto greased baking sheets. Pat them down and make 3 indents on one side of the cookie with a butter knife to form the claws of the paw. Bake at 350 for 12-15 minutes.

My skill level at making them actually look like bear paws: poor. Maybe I should have messed with the dough more to solidify it because when I used the knife it only seemed to push the dough apart. So mine didn't look like paws, but they were still yummy.

Let's be honest: oatmeal and the other ingredients are not visually appealing before being cooked. So let's take a peek at the brown sugar and butter in my new mixer:


We'll let that and the finished product picture guide us for this recipe. It'll make the recipe more appealing. I promise.

Hot Chocolate Chip Cookies


I like to bake. I like to compare. I like to challenge it when someone calls a recipe "the best". What does this say about me? Am I contrary or simply a bit mischievous? Maybe it just means that I am trying to better my recipe box or develop my palate. Hmmm. I'm feeling a little ornery this morning, so I think I'd side with mischievous. But I think when I'm feeling less like a punk, it means that I'm simply looking for great recipes.

Okay, I just took a chill pill, so I'm feeling less like a troublemaker. I think I like challenging the "best" recipes because it gives me room to learn. It allows me to see if there are adaptations I'd like to make to my own cooking. Oh, and by chill pill I just mean that I ran 80 laps around my house. And by 80 laps I mean that I sent an email to a friend which helped to clear my mind. Friends are the best kinds of chill pills.

Am I on crack today? I've already cycled through feeling mischievous, being calm, and then sappy. My allergies are throwing me for a loop. (In the interest of full disclosure, I have taken no medication today. I did take an allergy pill yesterday afternoon. The end.)

Okay, before I completely lose you all, let's get to the recipe... Why do words you've used countless times sometimes start to look so wrong? Today's example: let's. Don't you worry your little heart, I couldn't bear to use the wrong form, so I confirmed that I was using the correct let's (vs. lets). I know, I know. I'm messed up in the head. Good thing I can bake. It's my saving grace.

Hot Chocolate Chip Cookies. Because really, why would I not try this recipe? I will tell you that the actual recipe called for milk, white, and semi-sweet chocolate chips. Guess what? I didn't listen. I don't like white chocolate and I'm not really a fan of semi-sweet. It's milk chocolate chips all the way for me. However, if you like those other chips feel free to mix them up and let me know what you think. I still won't use them, but I like hearing your thoughts.


2 sticks of Salted Butter at room temperature
1 cup white granulated sugar
2/3 cups packed light brown sugar
2 whole large eggs
1 teaspoon vanilla
3 1/4 cups all-purpose flour
4 packages (1 oz packets, not sugar-free) hot chocolate mix
1 teaspoon salt
1 1/4 teaspoon baking soda
1 cup of each type of chips

A couple notes: I usually stick with unsalted butter which means I only had one stick of salted butter on hand. I think using one of each worked just fine. And 3 cups of chips in a recipe? Are you kidding me? Maybe I'm a freak, but I don't like that many chips in my cookies. I mean, it was only at the persistent begging and pleading of my coworkers that I started to use a full bag of chips vs. 3/4 of a bag. I didn't measure out my chips, but I can guarantee you that I wasn't anywhere close to 3 cups. I'm not trying to induce sugar comas in the people that eat my cooking. Now, let's take a walk down therapy lane to investigate why I did not used to use a full bag of chips. My mom didn't. That means I grew up eating a cookie that balanced out enjoying the dough with the sweetness of the chocolate. Sometimes I actually enjoy the dough part more than the chocolate. Don't tell Ghiradelli.

Oh, and before I forget (which is likely to happen since I'm awfully scattered today...see what happens when I have gaps in blogging?), this recipe comes from elimaxandlela on Tasty Kitchen.

Now for the instructions (please don't give up on me, the cookies will be tasty):
Heat oven to 350 degrees. Cream butter and sugars until smooth. Beat in eggs and vanilla until combined. In a separate bowl, combine flour, hot chocolate mix, salt and baking soda. Add to wet ingredients in 3 to 4 parts, making sure all is incorporated.


See the texture? It was different than other cookies...fluffy yet dense. Is that even possible?

Fold in chips.


With my rebellious milk chips

Chill the dough for an hour or so. (This helps it to set up and makes it easier to make into balls.) Scoop onto a baking sheet lined with parchment paper (I just used Pam on mine). Bake for 9-11 minutes or until edges are golden brown. Let cool for 5 minutes before removing from pan.

Thursday, July 8, 2010

Banana Chocolate Chip Cookies


You may remember my professed love for Starbucks' Banana Chocolate Chip Coffee Cake. No? Well, let me remind you. I LOOOOOOOVE it. I love it so much that when I stopped in Starbucks a couple weeks ago on my drive home from Columbia, I was simply giddy to find there was one slice left. And then I was instantly paranoid that the woman in front of me would order it. She did not and so I smiled with glee about my success. Anyway, since trying the coffee cake while visiting Tulsa I've been slightly obsessed with the combination of banana and chocolate chips. I made a couple breads and found one I liked pretty well. So, when I had bananas that REALLY needed to be used I planned on making banana chocolate chip bread. Then, the idea of banana chocolate chip cookies came to mind. I found a recipe online which comes from the Miraval Spa. I have no clue where that spa is located, but I can tell you that they know their banana chocolate chip cookies. Ridiculous. These cookies were gooooood. Make them today. Or in a couple days when your bananas are really ripe. Hey, it counts as fruit in your diet....right?

1/2 cup butter, softened
1/2 cup unsweetened applesauce
1 cup raw cane sugar (Turbinado aka Sugar in the Raw)
3 medium ripe bananas, mashed
2 large eggs
1 teaspoon pure vanilla extract
2 1/2 cups all-purpose flour
1 1/2 teaspoons baking soda
2 cups quick-cooking oats (I only had old-fashioned oats which worked fine.)
1 cup chocolate chips


Preheat oven to 350 degrees. Coat 2 baking sheets with cooking spray. In a mixing bowl, combine the butter and applesauce and beat with an electric mixer until creamy. Add the sugar, bananas, eggs and vanilla.


Beat until smooth. Gradually add the flour and baking soda. Stir in the oats and chocolate chips until incorporated. Drop the dough by teaspoons onto the baking sheets. Bake 7 to 10 minutes or until golden brown.


Look! A heart. :) Awwww.
(If you can't see it, please don't judge my sanity. Or do, just don't report your concerns.)

Thursday, June 17, 2010

Malted Milk Chocolate Chip Cookies


Wanna guess who this recipe comes from? I bet you'll just need one guess. Yup. The Pioneer Woman. I'll confess that I visit her site daily. She makes me laugh, provides great recipes and photographs, and I want her life. Well, sort of. I don't think I could actually live on a ranch in the middle of nowhere. No Target for miles? Oh geez. That would be torture for me.

I enjoy malt flavoring. Chocolate malts? YUM. So I didn't hesitate for a second when she posted this recipe. Let me tell you right now, these cookie are supposed to be flat. FLAT. That kind of reminded me of my Grandma G's cookies, so it was a nice memory tucked into the recipe. Anyway, prepare yourself for a flat cookie. I've never made a cookie that was supposed to be flat; I've only had one recipe that ended up flat due to a forgotten ingredient. It was a mental hurdle I had to conquer. Anyway, these were really good and delightful and deceitful. Flat does not equal fewer calories, people. Keep that in mind when your hand wants to wander back to them because it will. Mmmmm. They were so good.


(Did you notice that I forgot the chocolate chips for the malted milk CHOCOLATE CHIP cookies? Geez. They were simply sitting off to the side...forelorn...with a single tear sliding down the bag. Sad.)

1 cup (2 Sticks) Unsalted Butter Softened
¾ cups Golden Brown Sugar
¾ cups Sugar
2 whole Eggs
2 teaspoons Vanilla Extract
2 cups All-purpose Flour
1-¼ teaspoon Baking Soda
1-¼ teaspoon Salt
½ cups (rounded) Malted Milk Powder
1 bag (12 Ounce) Milk Chocolate Chips


Look at them all lined up, ready to work. Like a little army of ingredients. I must say that laying out all my ingredients prior to mixing would be one of my top tips for you. It guarantees that you have everything you need prior to starting. I hate getting caught without an ingredient once I've started mixing.

Preheat oven to 375 degrees.
Cream butter, then add both sugars and cream until fluffy. Add eggs and beat slightly, then add vanilla and beat until combined. Add malted milk powder and beat until combined. Sift together flour, baking soda, and salt. Add to butter mixture, beating gently until just combined. Add chocolate chips and stir in gently.


Drop by teaspoonfuls (or use a cookie scoop) and bake for 10 to 12 minutes. Bake less if you want chewy cookies; more if you want crispy cookies.


Wednesday, April 28, 2010

Just Guess

If you guessed MORE chocolate chip cookies, you are correct! I tried two different batches today. I used the same basic recipe, but the difference was I used milk/dark chocolate chunks for the first one and semi-sweet chips for the second. When I took them to the staff meeting the second recipe won without any hesitation. I have to agree. The second is my favorite too. :) I'm still not going to share the recipe, but I'll at least share some pictures.


Batch #1

Batch #1


The chocolate used for Batch #1


Batch #2

Batch #2

Friday, April 16, 2010

I've been holding out...

Good Morning, friends. :) Well, I've been holding out on you. I tried a new chocolate chip cookie recipe about a week ago. They were pretty fantastic...as in, I may have found my favorite chocolate chip cookie recipe ever. EVER. I want to try a thing or two with it, but I feel like I'm sooo close after nearly a year long search. We'll see. But as time has passed, I feel a little selfish refusing to share it. I had never considered keeping recipes a secret until this one. I liked the idea of having a prized jewel recipe. But wouldn't it be sad if no one else experienced these cookies?

Monday, March 29, 2010

More Chocolate Chip Cookies

Earlier today I was looking at a cooking blog (notwithoutsalt.com)and found what is described as the last chocolate chip cookie recipe you'll ever need. I had already decided that I was going to cook or bake today because it's been a while, but I didn't have a recipe in mind. So once I saw the recipe I knew I had to try it. I also made dinner for the girls that was lemon-garlic tilapia, pasta, and asparagus; however, I'm not including those because there wasn't much "cooking" involved. Mostly seasoning. Okay, back to the cookies. They're good. I need to try them tomorrow to see how I truly feel. I think the best time to get the flavor of a cookie (or most baked items) is the next morning when the flavors have had time to settle. So far Sesha likes them a lot and Stalena thinks they're good, but she's not sold that they're the ultimate.

The Last Chocolate Chip Cookie? (from notwithoutsalt.com)

2 sticks butter
1/4 cup white sugar
1/4 cup Turbinado sugar (aka Sugar in the Raw)
1 3/4 cup light brown sugar, packed
2 eggs
2 tsp vanilla (I LOVE vanilla so seeing this double amount made me happy.)
3 1/2 cup all-purpose flour
1 1/2 tsp baking soda
3/4 tsp salt
1 lb chocolate (Use the best quality chocolate you can afford. Cut the chunks roughly 1/2 inch)

Cream the butter and the sugars until light. Scrape down the side of the bowl. Continue mixing while adding the eggs one at a time. Make sure each egg is incorporated before adding the next. Add the vanilla. Combine the flour, soda, and salt in another bowl. With a whisk, stir to combine. With the machine on low, slowly add the flour. Mix until just combined, taking care not to over mix. With a spatula fold in the chocolate. Bake at 360 degrees for 12 minutes.

She said to use chocolate chunks instead of chocolate chips because chips have some wax to help hold their shape. The chunks allow the chocolate to melt into the layers. I bought a giant (14 oz) chocolate bar and cut it up. It was the largest one I found and even though it's a bit shy of the 1 lb suggestion, I think it was plenty of chocolate.

One day I'm going to own a beautiful, lovely, hardworking stand mixer so that my hands don't have to cramp after my little handheld mixer reaches it's max.


Monday, January 11, 2010

Neiman-Marcus Cookies

Neiman-Marcus Cookies aka cookies I'll likely never make again. This receipe came from Tressa Yinger from the church cookbook. Here's thing thing about me and cooking: I want a product that tastes good and that isn't overly complicated. This recipe was more labor intensive than I want for a cookie recipe. And while they're good, I think there are other cookies I prefer.

Neiman-Marcus Cookies

1 c. butter
1 c. brown sugar
1 c. sugar
2 eggs
1 tsp. vanilla
2 c. flour
2 1/2 c. blended oatmeal
1/2 tsp. salt
1 tsp. baking powder
1 tsp. baking soda
12 oz. chocolate chips
1 (4 oz) Hershey bar, grated
1 1/2 c. chopped nuts (I didn't use. I never add nuts to my recipes.)

Measure oatmeal and blend in a blender to a fine powder. Cream the butter and both sugars. Add eggs and vanilla; mix together with flour, oatmeal, salt, baking powder and baking soda. Add chocolate chips, Hershey bar and nuts. Roll into balls and place 2 inches apart on a cookie sheet. Bake for 10 minutes at 375 degrees.

This recipe was actually double the amounts, but I didn't want to make that many cookies so I halved it. Also, it's a stiffer dough so it was harder to work with. If I had used the full amounts, I would have probably gone mad by the time I finished mixing it. Here are a couple tips for you: grate your chocolate bar first. It's a time consuming step. I did mine the night before and I'm so glad that I did!!! Using a grater is my least favorite thing in the kitchen. I'm terrified that I'll grate my fingers. I used a knife to cut up the last bits that were to small to grate and yet too large to just toss into the cookies. Also, we don't have a blender, so I put my oatmeal in the food processor. A couple spins and it was ready. This recipe takes some muscle. Frankly, it wore me out. I was tired of the whole recipe by the end of it.


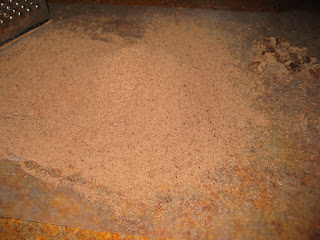
Can you believe this is all one of those giant chocolate bar equals?!!


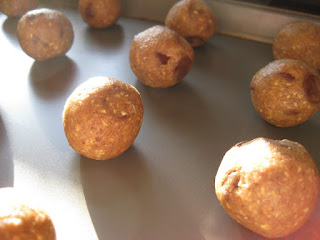
This may be the best advice I can give you: while the first batch is baking, use that 10 minutes to roll the rest of the dough. Hand-rolling dough isn't hard, but it's another time consuming step.